Hey there, garden crew, and welcome to my little corner of the web! I’m Jake, and if you’ve spent more than a day out here running a weed barrier fabric supply business, you know the number one question I get (like, basically every single time someone new slides into my DMs or stops by the trade show booth) is: “Can weed barrier fabric actually work in flower beds?” Weed Barrier Fabric

Let me cut to the chase here—this isn’t a yes or no trick question. It’s way more nuanced than that, and I’ve seen too many gardeners on TikTok or random Reddit threads either swearing by it like it’s magic or calling it the worst gardening invention ever. So today, I’m breaking this down like I would with a friend over a cold iced tea: no fancy jargon, no fluff, just real, hard-won lessons from people who’ve actually used our fabric in their flower beds (and made all the mistakes along the way).
First off, let’s get one tiny myth out of the way right now: weed barrier fabric isn’t just for driveways or vegetable rows. Yeah, we sell tons of it for those, but flower beds? That’s where most of the fun (and the chaos) happens, right? Let’s talk about why people even consider it in the first place. Pulling weeds is the worst. I’d know—last summer I spent three straight weekends yanking bindweed out of a customer’s rose bed, and my back hated me for weeks. Weed barrier blocks sunlight, which is what weeds (the annoying ones) need to grow. That alone sounds like a home run. But wait—flowers aren’t weeds. Most flowers need sunlight too, so there’s a catch here, and we’ll get to that.
Now, before we go any further, let’s be real: not all weed barrier fabric is created equal. That’s a big part of why this question is so divisive. I’ve seen cheap, flimsy stuff from big-box stores that tears after one season and lets every dandelion seed blow right through. And then I’ve seen the heavy-duty, polypropylene ones we supply that last 5+ years. So if you’ve tried a $5 roll from the hardware store and hated it, that’s not the fabric’s fault—it’s the budget version. Fair warning.
Okay, so let’s get into the actual how-tos and the what-nots, because that’s where most people go wrong. Let’s start with the do’s, because that’s where we want to set you up for success.
First do: prep the bed like your flowers depend on it. Wait—they do, right? Here’s the thing: you can’t just lay fabric on top of dirt and call it a day. If you have existing weeds in your flower bed, that fabric is going to trap them, not kill them. And when weeds get under fabric? They grow even harder to pull, because their roots are tangled up in the soil below the barrier. So step one: pull every single weed out, root and all. If you have stubborn ones like dandelions or crabgrass, go over the area with a hoe or a weeder to make sure you don’t leave any bits of root behind. I also recommend laying down a layer of cardboard over the dirt first (just plain, no ink) if you have super persistent weeds—this acts as an extra barrier that breaks down slowly over time, so it’s like a double whammy before even laying our fabric. It’s free, too, which is a win for any gardener on a budget.
Second do: pick the right fabric for your flower bed. This is crucial. If you’re planting low-growing ground covers or small annuals, you don’t need the thickest, heaviest barrier on the market—it’ll be too hard to poke holes in and might smother the plants later. For perennials, roses, or anything that will be in the bed for years, go for the mid-weight or heavy-duty stuff we sell—it’s sturdy enough to hold up to foot traffic (if you step on the bed sometimes) and won’t tear when you’re poking holes for plants. And important note: make sure it’s permeable. Like, water and nutrients need to get through to the roots, right? We all know how sad a parched rose or a stunted peony looks. So avoid the non-permeable plastic sheeting— that’s the garbage stuff that makes roots rot and drains all the good stuff. All our weed barrier fabric is designed to let water, air, and fertilizer pass through, so your plants stay happy.
Third do: plant the right way, and don’t skip the holes. This is the part that makes or breaks the whole thing. Once your fabric is laid down (more on laying it in a sec), you need to cut holes for every flower. Don’t just cut a tiny X—make it big enough for the entire root ball of your plant to fit through. Trust me, I learned this the hard way when my sister planted her peonies and only cut a 2-inch X. The roots couldn’t spread, and the flowers got tiny that year. She thought the fabric was the villain, but it was her bad cutting job. Also, when you put the plant in the hole, add a little extra soil or compost around the base to make sure no sunlight sneaks in next to the plant—sunlight is still a weed’s best friend, even a tiny gap.
Fourth do: cover the top of the fabric with mulch. Oh my gosh, this is the most underrated step, and I can’t stress it enough. If you leave the fabric exposed, it’s going to get sun-faded (which breaks it down faster), and those weed seeds that blow in from the yard will land on top and grow. But if you put 2-3 inches of bark mulch, pine straw, or even gravel on top? It looks way better, it hides the plastic-y look of the fabric, and it blocks that top layer of sunlight so seeds can’t sprout. I prefer bark mulch for flower beds because it adds nutrients to the soil as it breaks down, but whatever you like works—just don’t skip this.
Okay, now the don’ts. Because there are some big mistakes that make people hate using weed barrier in flower beds, and I want you to avoid them at all costs.
First don’t: use it on flower beds with plants that spread a lot. I’m talking about things like mint, creeping phlox, or even wild violets that take over everything. If you lay fabric, those plants will try to grow through the holes you cut, and eventually they’ll push the fabric up or grow around the edges. It’s not worth the hassle—for those types of plants, just pull weeds regularly. They’re stubborn enough on their own, you don’t need fabric making it worse.
Second don’t: use it if you’re planting new beds from scratch with seeds. Seeds need to be covered with soil to grow, right? If you lay fabric and then plant seeds, the seeds will be stuck under the barrier and won’t get the light they need. Save the fabric for established flower beds or beds where you’re planting mature plants (bulbs, potted flowers, bare-root roses) instead of seed beds.
Third don’t: lay the fabric too tight against plant bases. This is the rot risk. If you pull the fabric right up against the stem of a flower, moisture gets trapped there, and that’s a perfect spot for mold or fungal diseases to grow. Leave a tiny gap, and make sure the mulch isn’t piled up against the stem either—air flow is key.
Fourth don’t: re-use old fabric from other projects. I get it, it’s tempting—if you have a roll left over from your driveway or vegetable garden, why not use it for flowers? But that old fabric might have residual weed seeds from the last job, or it could be torn, or it’s already lost some of its permeability. It’s not worth risking your new flower bed. Grab a fresh roll when you’re ready for flowers.
Now, let’s talk about some real-life success stories, because I know you guys love that. Last spring, a customer named Mia from Portland hit us up. She had a rose bed that was overrun with bindweed—she’d tried pulling it, tried vinegar, even tried a weed torch, and nothing worked. She ordered our mid-weight weed barrier, prepped the bed by pulling every weed, laid down cardboard first, then the fabric, cut holes for her 12 rose bushes, added 3 inches of bark mulch. She texted me two months later, and those roses were huge—no bindweed, not a single dandelion, and she only watered when it rained. Another guy, Tom, from Ohio, uses it for his perennial bed: daylilies, hostas, and coneflowers. He’s had the same fabric for three years, and it’s still holding strong. No weeds, no tears, his flowers are bigger every year.
But I also need to be honest about the cons, because I don’t want to sugarcoat this. The biggest one is installation—it takes time to prep the bed, lay the fabric, cut all the holes, and add mulch. It’s not a 10-minute job. Also, if you make a mistake cutting holes, it’s easy to mess up a plant or leave a gap for weeds. And eventually, even the best fabric will break down after 5-7 years, so you’ll have to pull the old one and re-do the bed. That’s a big one—if you’re the type of person who likes to switch up your flower beds every year, fabric might not be for you. But if you want a low-maintenance bed that looks good for years, it’s worth the upfront work.
Another thing I get asked a lot: what about bulbs? Tulips, daffodils, crocuses—can I use weed barrier for those? Yeah, you can, but with a tiny adjustment. When you plant bulbs, don’t just cut a hole for each one. You can lay the fabric first, then cut a grid of small squares (like 6×6 inches) where you want to plant bulbs. Then, when you go to put the bulb in, you just pull back the fabric square, dig a hole, plant, and cover the fabric back down. That way, the bulbs get the sunlight they need in the spring, and the fabric blocks weeds the rest of the year. I’ve seen this work great for daffodil beds—no weeds growing up through the grass around them, and the bulbs come back every year.
Wait, what about vegetable gardens? No, that’s not what we’re talking about here, but I will say a quick note: if you’re mixing flowers and veggies, stick to separate beds. Vegetables need different soil prep and more frequent tilling, which can tear the fabric. Save the fabric for the flower beds where you want minimal work.
Let me wrap this up with a quick check list, so you don’t have to remember everything:
✅ Prep bed: pull all weeds, no roots left behind
✅ Use permeable, mid-heavy weight fabric (avoid cheap plastic)
✅ Cut holes big enough for plant roots, leave gaps at stems
✅ Cover fabric with 2-3 inches of mulch
✅ Good for established flower beds, perennials, roses, bulbs
❌ Don’t use on spreading plants (mint, creeping phlox)
❌ Don’t use for seed beds
❌ Don’t use old, torn fabric
❌ Don’t skip mulch
At the end of the day, weed barrier fabric can absolutely be used in flower beds—if you do it the right way. It’s not a set-it-and-forget-it thing, but it cuts down weed pulling by like 80%, which is my favorite part. I’ve spent way too many weekends in the garden, so anything that lets me drink coffee instead of yanking weeds is a win in my book.
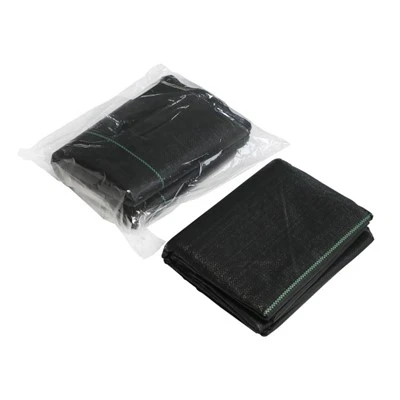
If you’re curious about what fabric works best for your flower bed, or you’re ready to grab a roll for your own project, hit me up. I can walk you through the different weights, answer any questions you have, and make sure you get exactly what you need so your flower bed stays weed-free for years. No pressure, just garden crew helping garden crew.
Special Process PP Woven Bags Thanks for hanging out with me today. Now go get your hands dirty (and maybe avoid back pain this year!).
References
- American Horticultural Society. (2021). Weed Control for Ornamental Gardens. Royal Horticultural Society Press.
- USDA Natural Resources Conservation Service. (2019). Permeable Landscape Fabrics: Benefits and Installation Best Practices. U.S. Department of Agriculture.
- Davis, E. (2022). The No-Weed Garden: Proven Methods for Low-Maintenance Flower Beds. Timber Press.
- University of California Agriculture and Natural Resources. (2020). Weed Management in Landscape Beds. UC ANR Publication 8500.
Linyi Dongyi Import&Export Co., Ltd.
As one of the most professional weed barrier fabric manufacturers and suppliers in China, we offer a wide range of products with superior quality. We warmly welcome you to wholesale bulk customized weed barrier fabric from our factory. If you have any enquiry about quotation, please feel free to email us.
Address: 4 F, Zone A, Zhangjia Zhuxu Village, Lanshan District, Linyi City.
E-mail: donglai01972@gmail.com
WebSite: https://www.donglaipack.com/
